I'm currently available for game dev work and/or commissions. See my resume.

I'm currently available for game dev work and/or commissions. See my resume.
Analog thumbsticks typically send input to your code in the form of two numbers: one for the X (horizontal) axis, and one for the Y (vertical) axis. Usually the number ranges from −1 (fully extended one direction) to +1 (fully extended the opposite direction), where 0 is dead-center. The assumption is that if you’re not touching the stick, it’ll return (0, 0).
In reality, though, thumbsticks vary in quality and wear out over time. You’ve probably used a gamepad at some point that had a loose or “wiggly” stick; in that case, the neutral position is just a little bit off from (0, 0), even though you’re not touching the stick. To your code, that’s indistinguishable from the player pushing the stick just a tiny, tiny bit.
Dead zones are simply a minimum input threshold, often somewhere between 0.1 to 0.2. If the input received from the stick is smaller than that, it’s ignored.
Have you ever played a game where the camera moved or rotated very slowly of its own accord, even though you weren’t touching the stick at all? That’s a case of a missing (or too-small) dead zone. (Curiously, I see this issue in a lot of Xbox 360 first-person shooters.)
So to sum up: dead zones prevent unexpected input from loose thumbsticks.
Okay, let’s start with a look at the naïve implementation of a dead zone. This is the method everyone jumps to first, because it’s the most immediately intuitive:
float deadzone = 0.25f;
Vector2 stickInput = new Vector2(Input.GetAxis("Horizontal"), Input.GetAxis("Vertical"));
if(Mathf.Abs(stickInput.x) < deadzone)
{
    stickInput.x = 0.0f;
}
if(Mathf.Abs(stickInput.y) < deadzone)
{
    stickInput.y = 0.0f;
}
Simple enough: if our input magnitude in either direction is less than our dead zone, we simply zero out the input in that direction, and that’s all there is to it… right?
Well, here’s a diagram of what this kind of dead zone looks like. The circle represents rotation space of the thumbstick (it’s the same as circular opening in your controller that the stick is seated in), and the red shaded area represents where the dead zone will kick in and cancel out your input:

In practice, this implementation feels very bad, and you’ll notice it whenever you try to rotate the stick in a sweeping motion (which is a really common gesture in first-person shooters). What happens is, as you rotate the stick across one of the cardinal directions — anywhere within the red shaded area — you’ll feel it “snap” to the cardinal. If you’re making a game that’s all about 2D four-directional movement (maybe a Bomberman clone or something) then that’s great, but for anything requiring analog precision (like a first-person or twin-stick shooter) this is nowhere near accurate enough.
Fortunately it’s really easy to get rid of the cardinal-direction snap. We simply test the magnitude of the entire input vector, rather than testing each axis separately:
float deadzone = 0.25f;
Vector2 stickInput = new Vector2(Input.GetAxis("Horizontal"), Input.GetAxis("Vertical"));
if(stickInput.magnitude < deadzone)
{
    stickInput = Vector2.zero;
}
This is much better. For many games, you could probably ship with this; in fact, this method is the most common one I’ve seen people propose recently. Here’s what that dead zone looks like on the stick:

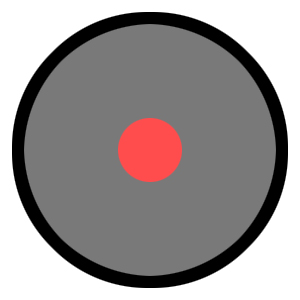
When we think about dead zones, this is usually the kind of thing we’re envisioning: a very small area in the center of the stick within which input is ignored. The size of the area is simply our best guess at how far a loose, worn-out stick is likely to wiggle on its own, without physical input.
If you’re making a first- or third-person shooter, odds are you need all the input precision you can get. The previous method covers you for large movements, but you’ll find a flaw when you try to make very fine, low-magnitude adjustments (like aiming a sniper rifle). As you slowly push the stick away from neutral, you’ll feel the edge of the dead zone as your aim suddenly “kicks” into motion. This doesn’t feel smooth, and can make high-precision gameplay feel extremely tedious in a way that can be hard to define.
The problem with the previous method is that it’s clipping the input vector below the dead zone, which means all the precision that exists inside the dead zone is completely lost. In other words, you can’t smoothly ramp your input from 0 to +1 any more; instead you snap from 0 to +0.2 (or whatever your dead zone is), and then you ramp from +0.2 to +1.
Here’s an illustration:

The gradient indicates the strength of the resulting input (after the dead zone is applied). Note that the edge of the dead zone is clearly visible: as you push the stick away from the center, the gradient value changes suddenly, not smoothly, at that edge.
Fortunately, the high-precision problem is also very easy to fix. We just need to rescale the clipped input vector into the non-dead zone space:
float deadzone = 0.25f;
Vector2 stickInput = new Vector2(Input.GetAxis("Horizontal"), Input.GetAxis("Vertical"));
if(stickInput.magnitude < deadzone)
{
    stickInput = Vector2.zero;
}
else
{
    stickInput = stickInput.normalized * ((stickInput.magnitude - deadzone) / (1 - deadzone));
}
Here’s what the adjusted dead zone looks like:

Notice that there’s no longer a visible edge: as you push the stick away from the center, the gradient value changes smoothly while the dead zone is still preserved. This feels buttery-smooth!
I called it the “right” way but that doesn’t mean you’ll never use any other method, ever. The most important thing is to use the method that makes sense for your particular project. Here are a few scenarios:
Now go forth and implement your dead zones properly! It’s easy, and your players will appreciate it.